Hello! Readers, This post I decided for the programmers. As most of the backend- server-based programmer requires a local server to run their programs. Some newbies don't know all about this tool, they are trouble about how to install XAMPP tool? Few of an existing user get common issues of the Apache server is not starting. Setting up XAMPP somewhat complex but not as much. I explain common problems why server not starting, How to establish that. For sure this article help to everyone as I will cover each an every step here. Afterwards reading this entire article everyone will able to install XAMPP, even more, able to fix common issues.
Before going ahead let's know various aspects related to our topics.
What is XAMPP?
XAMPP is most prevailing, free an open source cross-platform which is one solution to run your web services. XAMPP is developed by ApacheFriends which released in May 2002. XAMPP Stands for Cross Platform(X), Apache(A), MySQL(M) also Sometimes (M) refers to MariaDB, PHP(P) and Pearl(P).Where, Cross-platform means it available for multiple operating systems like, windows, Linux and MacOS.
XAMPP developed using PHP Scripting language and using pearl programming language.
Likewise, An individual platform available for each operating system. Windows have WAMPP, LAMPP for Linux, MAMPP is available for MacOS.
What can do with XAMPP?
Mostly PHP developers are preferred XAMPP tool while developing their web applications or projects. XAMPP tool provides one easy solution to run server and database which beneficial for web developers to host their web application locally.
Why We Need to Installed XAMMP?
Sure you raise this question. You might familiar with the HTML- Hyper Text Markup Language isn't? It is a basic markup language only. HTML program can execute directly on the browser. While program developed with Scripting language can't. Scripting languages like PHP, Python, Ruby, etc.
Browser particularly understands HTML only. To work with scripting languages we need a server and database. XAMPP is one solution for that.
How to Install XAMPP Step by Step
Step #1
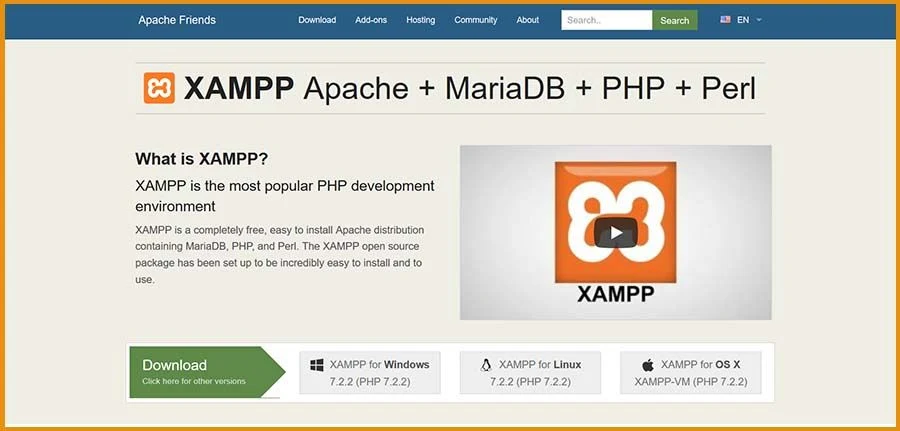
Go to www.apachefriends.org address, Follow window will come. Download XAMPP based on your operating system.
Download XAMPP for LINUXDownload XAMPP for MacOS
The current stable version for XAMPP is 7.2.1.
Want to download any older versions of XAMPP get from here.
Step #2
1. Once download completed. Launch the Installer file by right click and select run as administrator or simply hit double click.
2. You may get an alert, In case you have run an antivirus on your system. Blindly select YES to go ahead.
3. A setup wizard will appear showing Welcome message, sure to continue the process click on NEXT button.
 |
| XAMPP-Setup |
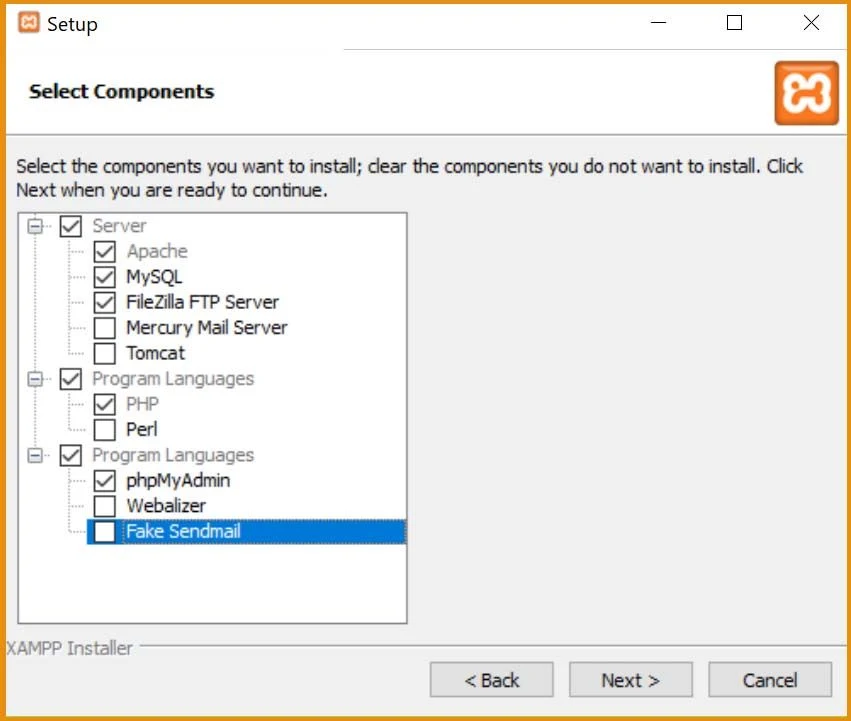
4. Next, You will be asked to select desired components which would like to install. Select required modules. It showing some servers along with the programming languages. PHP and Apache are selected by default. To work with database additionally you have to select MySQL server and PHP MyAdmin.

XAMPP-Select-Components

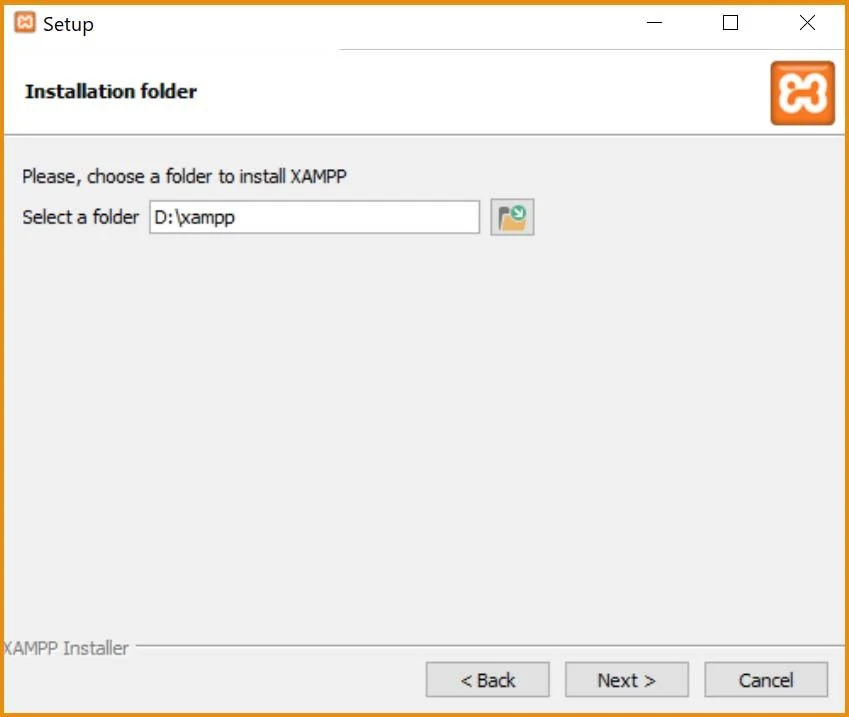
5. Next, select folder where would like to install. XAMPP tool. Generally, the default directory for windows is C:\xampp. All your programs are stored in this folder only.
reccommended to install on drive other than where sytem installed. Unfortunately whenever your sytem crash it won't affect other drives and all your programs will be safe.
In my case, I am created new xampp folder inside non-system drive D. D:\xampp.

XAMPP-Select-Folder

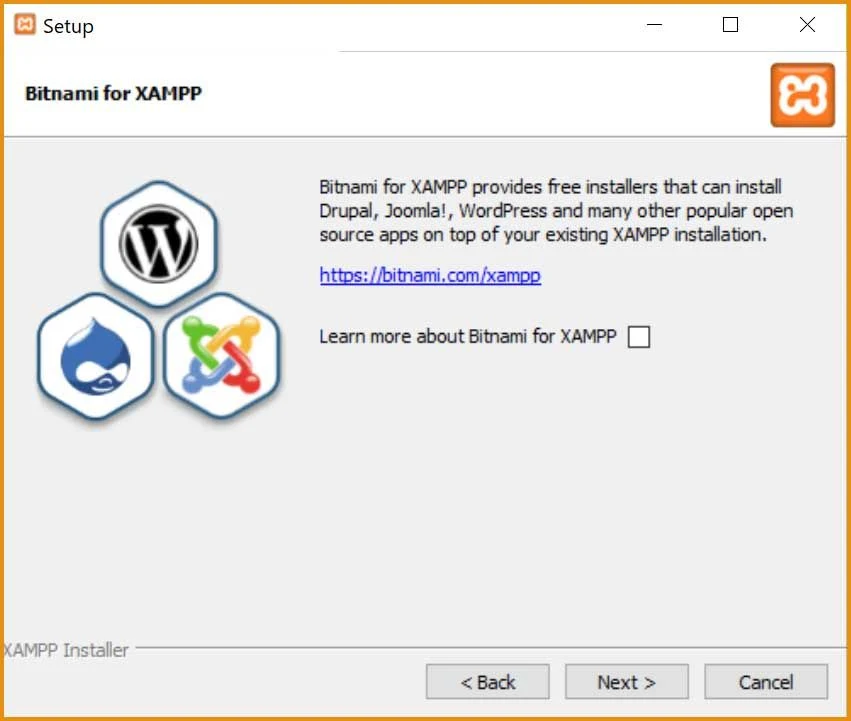
6. Then, it will ask to install Bitnami for XAMPP, which is a library for installing software like WordPress, Joomla, Drupal. Just untick and proceed to next

XAMPP-Bitnami

7. This is the final step, you are ready to an install XAMPP, click on NEXT to initialize the installation. Once installation process complete, It will show success message, "Setup has finished installing XAMPP on your computer".
Your installation is over, but the job is not to stop here, Keep calm!
Step #3 Check Whether XAMPP is Installed Successfully or not
Let's check before working with XAMPP, Server working or not?
Windows search for, XAMPP Control Panel and press Enter key.
Alternately, It can be accessed from the drive where you installed. Directory- Installed drive name:\folder name\xampp-control. In my case D:\xampp\control-panel.
 |
| XAMPP-Control-Panel |
After opening XAMPP Control Panel, the above interface will come.
Initially, all modules in off mode.
If Green colored background seen over the module button which indicates your local server started successfully without any issue whereas red color indicates the server does not establish due to port issue.
Let's check first Apache server, start the server first. Besides the start button, you will find an Admin button click on it. localhost URL will open with the default browser. Alternately you can test apache module by typing localhost on any browser, Lastly, you have another option to test Apache server working or not type, local IP 127.0.0.1 in the address bar and hit the ENTER key. You will redirect to http://localhost/dashboard/. If XAMPP welcome window appears, It means your Apache server works fine on your system.
 |
| XAMPP-Welcome-Window |
Do the same for MySql module, Click on admin button in front of MySQL or just type localhost/phpmyadmin or enter 127.0.0.1/phpmyadmin in the browser address bar, press ENTER. You find the screen as below. If you get this screen means Mysql also work successfully on your system.
 |
| XAMPP-PHP-MyAdmin |
Many people faced common issue of not starting an Apache and MySql server. Discover the solution below.
XAMPP is not working on localhost | Solved
Mostly with XAMPP a common error is a server not starting. Apache and MySql require port 80, 443 and 3306. Tomcat runs on port 8080. However, people get this error due to, might some of the software are using the same ports 80 and 443. Like Skype, Vmware
To overcome this server issue we have two choices
- Stop or uninstall the services which are using the port 80 and 443.
- Change the port for Apache and MySql.
Let's check first which service using specific ports.
Open the XAMPP-CONTROL panel.
Click on netstat button.
You will get list ports used by services, Green color indicates currently running services.
1. Stop or uninstall the services which are using the port 80 and 443
Open the XAMPP-CONTROL panel.
Click on netstat button.
You will get list ports used by services, Green color indicates currently running services.
1. Stop or uninstall the services which are using the port 80 and 443
In netstat windows, find which services are using port 80 and 443.
 |
| XAMPP-Netstat |
2. Change the port for Apache Server
By default, During installation of xampp tool, Apache service installed with port 80. Other than one service can't run on the same port.
You should change the default port 80 from Apache config file
Open the folder where you installed xampp.
Open apache folder.
Inside the apache folder, select the conf folder.
Open httpd.conf file with any editor.
Getting Hard?
You have another easy alternative.
Open xampp-control panel. At the right of the Apache server click on config button.
select first top one Apache(httpd.conf) option.
Inside the httpd.conf file search line ServerName localhost:80 here you can change 80 to any number. Set new port which is not used by other services. I'm going to change it with 8036. Similarly, search for listen replace 80 with the same port which set for ServerName localhost.
 |
| Apache-Change-Port |
Save the file by pressing CRT +S. Restart the apache module again.
After this enhancement, you have to manually type port no followed by localhost which has saved before in httpd.conf file to execute your program each time.
Example- http://localhost:port/yourfile.php. For me http://localhost:8036/filename.php
To run your programs, you must be saved your programs inside the htdocs folder.
Conclusion: -
You get an idea about the XAMPP, which is one solution to run the web services. The good thing it's totally free of cost.Still, you get trouble with installing or starting the server, Let me know in the comment box.


Whenever i try starting apache is gives me error message about .dll file corrupt or missing that i need to reinstall or start againd
ReplyDeleteUpdate your machine to get missing dll files.
DeleteIf still not solved, then uninstall and reinstall the xampp again