The first time I built a PC, I forgot the I/O shield. If you don't know what that is yet, don't worry, you will. I had the motherboard screwed in, the CPU cooler mounted, cables routed, and then I looked down at the metal backplate sitting on my desk. I had to tear out almost everything to slide it in. Total rebuild time: forty extra minutes and one bruised ego.
That mistake is avoidable, and so are the other seven I made that day. A complete guide to building your first custom PC shouldn't just list parts and tell you to "be careful." It should tell you what actually goes wrong, in what order, and why. That's what this is.
Key Takeaways
- Plan your build around the CPU socket first, because it locks in your motherboard, RAM generation, and often your cooler.
- The three compatibility traps that catch beginners most: GPU length vs. case clearance, PSU wattage vs. real power draw, and RAM profile (XMP/EXPO) vs. what your motherboard supports.
- Budget roughly 60% on CPU, GPU, and motherboard, and don't starve the power supply. A cheap PSU can take your whole build down with it.
- You don't need to assemble outside the case anymore. Modern cases and modular PSUs make in-case building the safer route for beginners.
- The build isn't done until BIOS is updated, XMP/EXPO is enabled, and your fan curves are set. Skipping this leaves performance on the table.
Why build your own PC instead of buying one?
Prebuilt machines have gotten better. They've also gotten sneakier. A system advertised as "gaming ready" with 16GB of RAM often ships with a single stick running in single-channel mode, which can cost you real frame rates. I've opened prebuilts where the power supply was a no-name unit rated at 500W that couldn't sustain 350W under load.
Building your own gives you three things a prebuilt rarely does: you know exactly what's inside, you can upgrade it without voiding anything, and you spend money where it matters to you rather than where it pads a spec sheet.
What you actually save
On a mid-range gaming machine, self-building typically saves somewhere between 10% and 20% versus an equivalent prebuilt, and that gap widens at the high end. But the savings aren't the main point. Control is. If you care about noise, you pick the cooler. If you care about silence more than RGB, you skip the fans that glow.
The honest downside
You are your own warranty. If a part arrives dead, you deal with the return. If you bend a CPU socket pin, that's on you, and motherboard makers will absolutely notice. This isn't meant to scare you. It's meant to set expectations: the build itself takes a few hours, but troubleshooting a no-boot can eat an evening.
All the parts you need to build a gaming PC
Every build comes down to seven core components. Miss one and nothing powers on. Get the pairings wrong and it powers on but won't post.
| Component | What it does | Beginner trap |
|---|---|---|
| CPU | Executes instructions; defines your socket | Buying a CPU that doesn't match the board's socket |
| Motherboard | Connects everything; sets RAM and PCIe limits | Chipset with too few M.2 slots or weak VRMs |
| GPU | Handles graphics and often most of your gaming budget | Length that doesn't fit the case |
| RAM | Temporary working memory | DDR4 vs DDR5 mismatch; single-stick kits |
| Storage | Your OS, games, files | Cheap DRAM-less SSDs that throttle |
| PSU | Delivers clean power to everything | Underestimating wattage for GPU transients |
| Case | Airflow, space, and cable management | Choosing looks before checking GPU clearance |
Rough budget tiers to work from
- Entry gaming (roughly $600–800): 6-core CPU, 8–12GB GPU, 16GB RAM, 1TB NVMe
- Mid-range (roughly $1,000–1,400): 8-core CPU, 12–16GB GPU, 32GB RAM, 2TB NVMe
- High-end (roughly $1,800 and up): 12+ cores, top-tier GPU, 32–64GB RAM, high-wattage PSU
- The wildcard nobody budgets for: Windows license, thermal paste if your cooler doesn't include it, and a spare SATA cable or two
Those figures shift with GPU pricing more than anything else, so treat them as starting points rather than gospel.
The compatibility traps that break first builds
Socket matching is the one everyone remembers. The ones people forget are subtler.
Will your GPU actually fit?
Measure the space from the rear bracket to the front of the case, then subtract the thickness of any front fans. Modern triple-fan GPUs are long, some well past 330mm, and a case that looks roomy on a product page can be tight once fans and cables are in. Check the manufacturer's spec sheet for both, and leave a little breathing room.
How much PSU wattage do you need?
Underestimate this and you get random shutdowns under load, which are maddening to diagnose. GPUs pull brief power spikes well above their rated draw. A safe habit is to take your GPU's recommended PSU wattage and add 100–150W of headroom. An 80 Plus Bronze unit from a known brand beats a "1000W" no-name every time.
RAM speed, XMP, and EXPO
Buying fast RAM and never enabling its profile is one of the most common mistakes I see. Out of the box, kits run at a low default speed. In BIOS you enable XMP (Intel platforms) or EXPO (AMD platforms) to reach the advertised clock. Skip it and you've paid for speed you're not getting.
How to build a PC step by step
The order matters more than the speed. Here's the sequence that avoids the I/O shield disaster I opened with.
Prep and the case
- Install the I/O shield first if your board doesn't have an integrated one. Learn from my mistake.
- Mount the power supply and route its main cables behind the motherboard tray before anything blocks access.
- Install the motherboard standoffs in the positions your board's form factor requires.
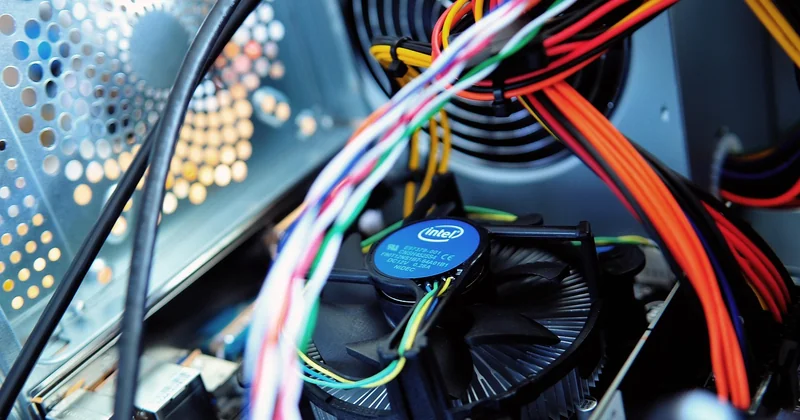
CPU, cooler, and RAM
Installing the CPU into the socket before mounting the board is fine and often easier. Line up the triangle marker, drop it in with zero pressure, and close the retention arm smoothly. Apply thermal paste, then mount the cooler. For RAM, seat sticks in the slots your manual specifies for two-stick kits, usually the second and fourth. Push until both clips click. If it feels like it needs force, it probably isn't aligned.
First boot
Connect the 24-pin, the CPU power, and the front panel headers, then try a boot before tidying cables. Seeing the BIOS screen now saves you from hunting a loose connector later.
What to do after the build boots
Getting to the desktop is the halfway point.
- Update the BIOS if the vendor ships a newer stable version. Do this before installing the OS where possible.
- Enable XMP or EXPO in BIOS and confirm the RAM speed in the OS.
- Set your fan curves. Default curves are often loud; a gentle slope keeps things quiet at idle.
- Update chipset and GPU drivers from the manufacturers, not through a random third-party tool.
It won't turn on. Now what?
Check the power supply switch first, then the front panel header. Reseat the RAM. Try one stick at a time. A motherboard debug LED or a beep code will often tell you exactly which component is failing to initialize, so read the manual for what that light means. Nine times out of ten, it's a connector that isn't fully seated.
A first build is a one-time lesson
The parts you pick today will be obsolete in a few years. The skills won't be. Once you've diagnosed a no-boot, enabled a RAM profile, and swapped a GPU without breaking anything, every future upgrade becomes routine. The I/O shield only gets you once.